Genesis Responsive Slider
I would like to send out a quick thank you again for your purchase 🙂
Important Message
This tutorial will go over how to setup the Homepage to have a slider. But, please first understand that sometimes a slider does not work for everyone. A slider works best when you are using large photos and that are about the same size all the time… or at least the main photo (called a Featured Image) for each post. If your photos are small and vary in size then this will cause alignment issues and extra white space in the slider area. You can always give it a try and see if it works for you.
STEP 1
Let’s begin. You’ll first need to have at least 3 posts with a “Featured Image” attached to it. See the picture below on where to add the “Featured Image”. There must be a picture in this area or the slider will not work. Every time you create a new post be sure to add an image in the “Featured Image” section.

STEP 2
Now we need to install a plugin called “Genesis Responsive Slider” and this is how:
1. After you are logged into your WordPress Dashboard click on “Plugins” then “Add New”.
2. In the search field type in Genesis Responsive Slider.

3. When you see the plugin called Genesis Responsive Slider click on the button that says “Install Now”.
4. After it installs click on “Activate Plugin”.
STEP 3
Now we need to configure the Slider settings and this is how:
1. Click on “Genesis” then “Slider Settings”.
2. There are a few changes you will need to make. Please make the changes according to the picture below.
Please Note: when looking at the picture below… if you purchased the Mrs. Chalkboard theme… please change the Display Settings as follow:
Maximum Slider Width to 730
Maximum Slider Height to 380
All other themes please see the image below for your display settings.

3. When you are done click on “Save Settings”.
STEP 4
Now it’s time to add the slider to the homepage.
1. Click on “Appearance” then “Widgets”.
2. Click on “Genesis Responsive Slider” then choose “Home Slider” (or move it to Home Slider). Next click on “Save” in the Genesis Responsive Slider” widget.
3. Now view your blog to see the slider.
STEP 5
Do your pictures in the slider look small, stretched out (blurry), or cut off? If not then you can skip this step. If they are then please follow these steps below.
Stretched Out Blurry Pictures
If your pictures look stretched out and blurry then you will need to run a plugin called “Regenerate Plugin”. This is how:
1. Go to “Plugins” then “Add New”. Next type in Regenerate Thumbnails in the search area. Install it then activate it.
2. Next go to “Tools” then click on “Regen. Thumbnails”. This is where you can run it. If you have a lot of images then it may take a while for the plugin do it’s magic.
This should fix the problem. If you are still experiencing problems please contact me and let me know.
Cut Off Pictures
WordPress will automatically choose the middle of your picture when adding it to the slider. If you don’t like this… I do have a solution so that you can choose what part of the picture you would like displayed on the slider. We will need to install another plugin.
1. Go to “Plugins” then “Add New”. Type in the search box “Crop Thumbnails”. See the picture below for the one you need.
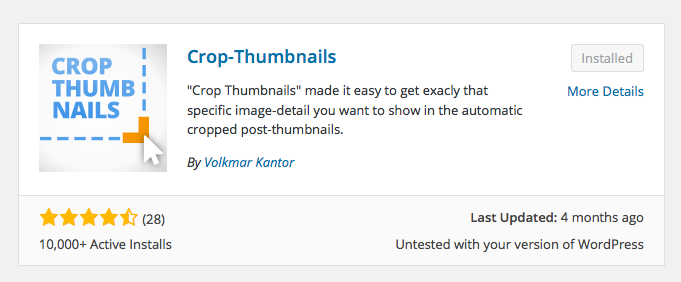
2. Click on “Install Now” then “Activate Plugin”.
3. Next we need to go to our first few posts (the ones that are displayed on your slider). Click on “Posts” then “Edit” the first post.
4. Click on “Crop Featured Image” in the “Featured Image” area.

5. Follow the steps provided in the “Crop Featured” Image” pop up box.
6. When done click on “Update” under “Publish” in the post area.